Flask-Menu review
Posted on Mon 13 May 2024 in Flask
Flask-Menu is an extension for the Flask framework that helps developers build navigation menus for web apps. It enables developers to easily implement dynamic navigation menus, which can be particularly useful for applications with navigation needs that change based on user roles or context.
The extension supports the creation of hierarchical menu structures, allowing developers to define parent and child menu items so they can create complex navigation schemes with multiple levels. It enables the developer to create menues in a composable fashion, by applying decorators to view functions in the main application or in its blueprints.
Flask-Menu integrates well with Flask templates, allowing developers to render menus using Jinja2 template syntax. It makes all menu-item information available in the template context where it can be used to build a menu or navigation bar.
Flask-Menu development issues
At the time I write this post (May, 2024), Flask-Menu 1.0.1 is not compatible with the current version of Flask, v3.0. Flask introduced a change in v2.3 that breaks Flask-Menu.
This issue has existed since October 2023. The Flask-Menu maintainer seems to be working on ways to address it but, apparently, it is a difficult problem.
The Flask-menu documentation has not been updated since version 0.7.0. The documentation is still useful, with a few good examples. However, it would be nice if the compatibility issue was described in the documentation so I did not have to figure out which versions of Flask and Flask-Security-Too were still compatible with Flask-Menu 1.0.1.
Despite the compatibility problem, I still want to see how it works. So I used the older versions of the necessary packages and created the tutorial, below.
Add a navigation menu to a Flask app
I used Flask-Menu to add a simple navigation menu to my current project, a small Flask app that has two pages. Follow along with my previous post to build the application or get the code directly from GitHub and run it, as shown below:
$ wget https://github.com/blinklet/music-festival-organizer/archive/refs/tags/0.002.zip
$ unzip 0.002.zip
$ ls -1
0.002.zip
music-festival-organizer-0.002
$ cd music-festival-organizer-0.002
$ python3 -m venv .venv
$ source .venv/bin/activate
(.venv) $ flask --app mfo.app database create
(.venv) $ sh ../tests/make-users.sh
(.venv) $ flask --app mfo.app run --debug
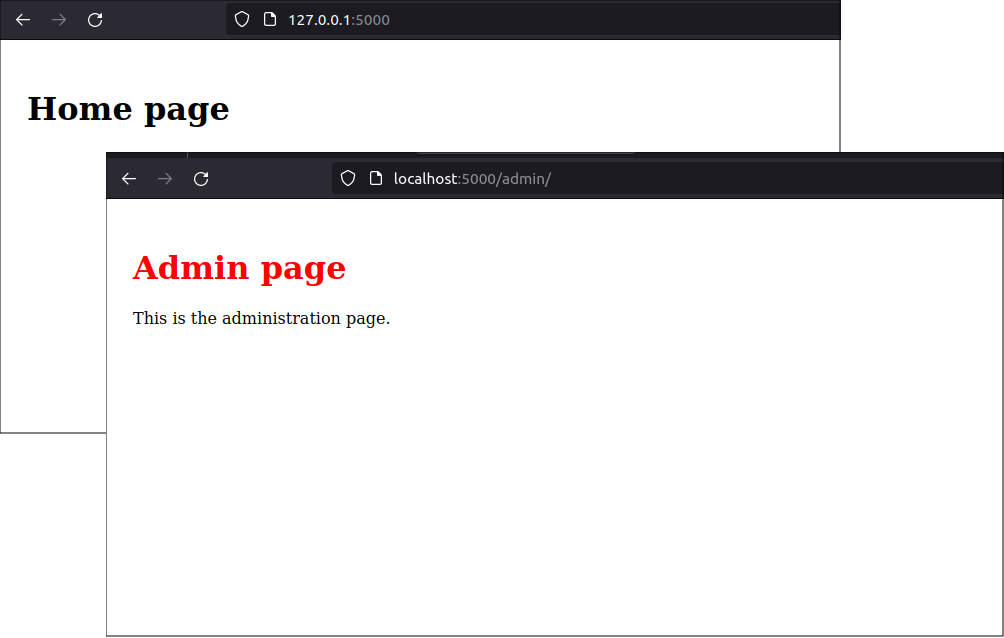
You will see that, if you log into the app as the admin user, admin@testmail.com with the password abcd1234, the app provides two routes: https://localhost:5000/ and https://localhost:5000/admin, as shown below:
Install Flask-Menu
To use Flask-menu v1.0.1, you need to use an older version of Flask, which then requires an older version of Flask-Security-Too. Update the requirements.txt file as follows
flask==2.2.5
python-dotenv
Flask-Security-Too[fsqla,common]==5.1.2
Flask-Menu==1.0.1
Bootstrap-Flask
Then, run the command:
(.venv) $ pip install --force-reinstall -r requirements.txt
Register Flask-Menu with the app
Import the Menu class from Flask-Menu and register it with the app as shown below:
# mfo/app.py

import flask
from flask_security import Security
from flask_menu import Menu

import mfo.home.views
import mfo.admin.views
import mfo.database.users as users
import mfo.database.commands
import mfo.database.base as base

def create_app():

    # Create app object
    app = flask.Flask(__name__)

    # Configure the app
    app.config.from_pyfile('config.py')

    # Register Flask-SQLAlchemy
    base.db.init_app(app)

    # Register Flask-Security-Too
    app.security = Security(app, users.user_datastore)

    # Register Flask-Menu
    Menu(app=app)

    # Register blueprints
    app.register_blueprint(mfo.home.views.bp)
    app.register_blueprint(mfo.admin.views.bp)
    app.register_blueprint(mfo.database.commands.bp)

    return app
Decorate view functions
Add a Flask-Menu register_menu decorator to each view function that needs an entry in the navigation bar. Add parameters that indicate which users can view which items. You need to create helper functions, like the user_is_admin() function below, to do this.
For example, in Admin blueprint:
# mfo/admin/views.py

import flask
import flask_security
import flask_menu
from werkzeug.exceptions import Forbidden

bp = flask.Blueprint(
    'admin',
    __name__,
    static_folder='static',
    template_folder='templates',
    url_prefix='/admin',
    )

def user_is_admin():
    return flask_security.current_user.has_role('Admin')

@bp.route('/')
@flask_security.auth_required()
@flask_security.roles_required('Admin')
@flask_menu.register_menu(bp, '.admin', 'Admin', order=1, visible_when=user_is_admin)
def index():
    return flask.render_template('/admin/index.html')

@bp.errorhandler(Forbidden)
def handle_forbidden(e):
    return flask.render_template('forbidden.html', role="Admin")
You can see how simple it is to add items to a menu. You just add a decorator to every view function that need a link in the navigation menu. When calling that decorator function, you set parameters that determine the information contained in the menu link.
In the Home blueprint, add a similar decorator function for the home menu. In this case, the menu item is visible to all users, so I did not define the visible_when parameter:
# mfo/home/views.py

import flask
import flask_security
import flask_menu

bp = flask.Blueprint(
    'home',
    __name__,
    static_folder='static',
    template_folder='templates',
    static_url_path='/home/static',
    url_prefix='/'
    )

@bp.route('/')
@flask_security.auth_required()
@flask_menu.register_menu(bp, '.home', 'MFO')
def index():
    return flask.render_template('/home/index.html')
Add a navigation bar to the base template
Create a template for the navigation menu. Make a template that can be included in other templates.
$ nano mfo/templates/navbar.html
Flask-Menu adds an object named current_menu to the template context. It contains attributes you can access to build the navbar menu:
<!-- mfo/templates/navbar.html -->

<ul>
    {% for item in current_menu.children %}
    {% if item.visible %}
        <li>
            {% if item.active %}<b>{% endif %}
                <a href="{{ item.url }}">{{ item.text }}</a>
            {% if item.active %}</b>{% endif %}
        </li>
    {% endif %}
    {% endfor %}
</ul>
In the main application template, named base.html, I added the navbar.html template. The new base.html file looks like below:
<!-- mfo/templates/base.html -->

<!DOCTYPE html>
<html lang="en">
<head>
    <meta charset="UTF-8">
    <title>{% block title %}Example Website{% endblock %}</title>
    <link rel="stylesheet" href="/static/css/styles.css" />
    {% block additional_css %}{% endblock %}
</head>

<body>
    <div class="content">

        {% include "navbar.html" %}

        {% block content %}
        {% endblock %}
    </div>
</body>
</html>
Test the application
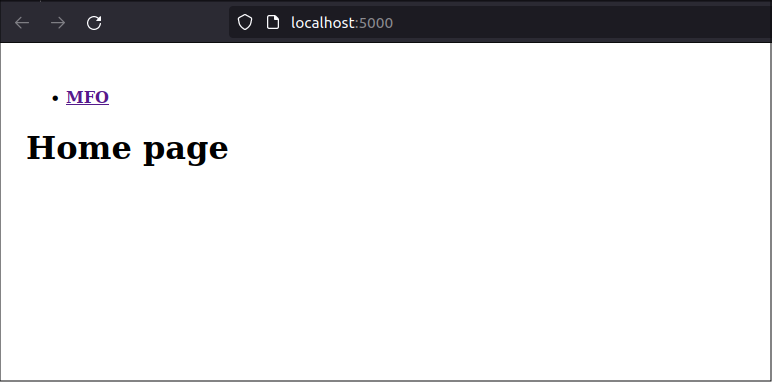
We created two menu items, using two decorators attached to the blueprints' view functions. Normal users will only see the home page menu, but admins will also see a link to the Admin page in the menu.
For example, a normal user sees the following, and can access only the home page:
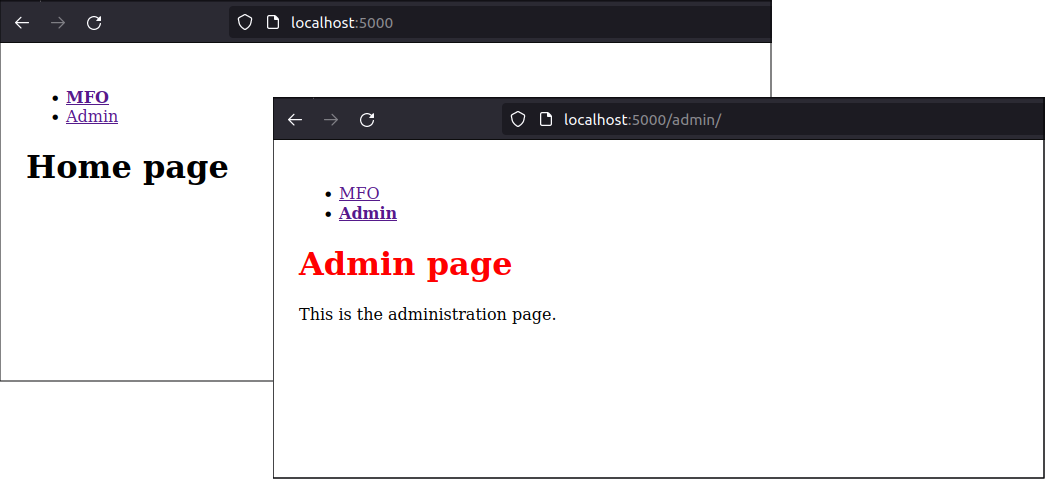
An admin will see two links and can access both pages, as shown below:
Styling the navigation menu
The navigation menu can be styled to look like a navigation bar. You can use CSS, or any CSS framework. In this case, we will use Bootstrap-Flask.
To style the navigation bar, First, set up the Bootstrap CSS framework in the application. First, import the Bootstrap5 class from the flask_bootstrap package. Then, call it to contruct the bootstrap object in your app, as shown below:
# mfo/app.py

import flask
from flask_security import Security
import flask_menu
from flask_bootstrap import Bootstrap5

import mfo.home.views
import mfo.admin.views
import mfo.database.users as users
import mfo.database.commands
import mfo.database.base as base

def create_app():

    # Create app object
    app = flask.Flask(__name__)

    # Configure the app
    app.config.from_pyfile('config.py')

    # Register Bootstrap-Flask
    bootstrap = Bootstrap5(app)

    # Register Flask-SQLAlchemy
    base.db.init_app(app)

    # Register Flask-Security-Too
    app.security = Security(app, users.user_datastore)

    # Register Flask-Menu
    flask_menu.Menu(app=app)

    # Register blueprints
    app.register_blueprint(mfo.home.views.bp)
    app.register_blueprint(mfo.admin.views.bp)
    app.register_blueprint(mfo.database.commands.bp)

    return app
Add the Bootstrap-Flask blocks to the base.html template. Load the Bootstrap CSS in the header and the Javascript at the end of the body, as shown below:
<!-- mfo/templates/base.html -->

<!DOCTYPE html>
<html lang="en">
<head>
    <meta charset="UTF-8">
    <meta name="viewport" content="width=device-width, initial-scale=1, shrink-to-fit=no">
    <title>{% block title %}Example Website{% endblock %}</title>
    <link rel="stylesheet" href="/static/css/styles.css" />

    {{ bootstrap.load_css() }}

    {% block additional_css %}{% endblock %}
</head>

<body>
    <div class="content">
        {% include "navbar.html" %}
        {% block content %}
        {% endblock %}

        {{ bootstrap.load_js() }}

    </div>
</body>
</html>
Finally, edit the navbar.html template and add the bootstrap classes to style the menu as a Bootstrap NavBar.
<!-- mfo/templates/navbar.html -->

<nav class="navbar navbar-expand-sm bg-primary" data-bs-theme="dark">
<div class="collapse navbar-collapse">
<ul class="navbar-nav mr-auto">
    {% for item in current_menu.children %}
    {% if item.visible %}
        <li class="nav-item">
            <a class="nav-link ps-3 {% if item.active %}active{% endif %}" href="{{ item.url }}">{{ item.text }}</a>
        </li>
    {% endif %}
    {% endfor %}
</ul>
</div>
</nav>
Now, the menu looks like a navigation bar. The admin's view is shown below. A normal user would see only the link to the home page in the navbar.
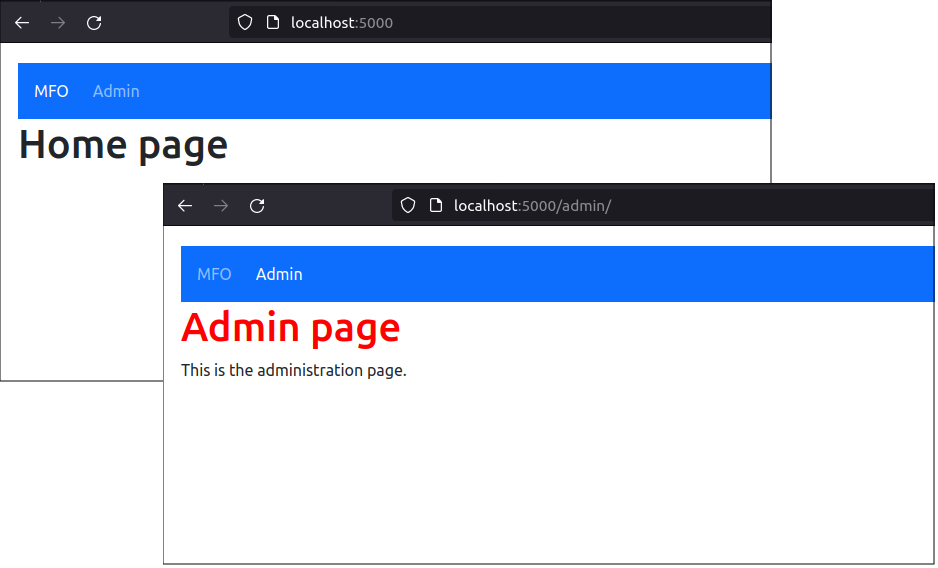
You can see that Flask-Menu works well with CSS frameworks like Bootstrap because it creates an iterable object containing menu items that can be styled using HTML and CSS in a Jinja2 template.
Conclusion
Flask-Menu makes it easy to build complex navigation menus and sub-menus. Because developers define the menu-item in the same place as the view function, it is easy to change a menu-item if the view function changes.
Flask-Menu has a lot of potential. However, the project needs to fix the compatibility issue before I would recommend it to developers.